Showing posts with label jewish art. Show all posts

Eph + Eph, or How to Make A Chuppah

>> Tuesday, June 11, 2013

Sometimes you show up to graduate school and find out that another cohort-mate went to your alma mater, albeit 6 years after you did. Then you bond over purple cows, and become friends and office-mates. You meet his partner (who also attended your alma mater), who eventually moves to town, and you hang out some more. Eventually they get engaged and you offer to make their chuppah (wedding canopy) and, finally, about 4 months before the wedding, it's time to make it. So, how to make your friends a chuppah, in 10 easy steps.


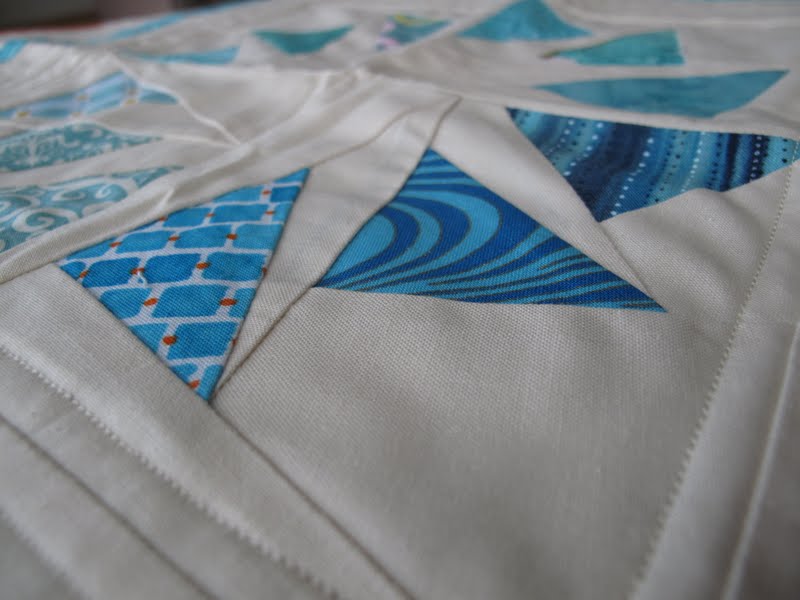
1. Have friends who also have thoughts about design. A&Y looked through my blog and some flickr groups and we met to discuss what they liked and found compelling -- something modern, something with purples and blues, and something containing both regularity and surprise. I suggested a modern, random half-square triangle design, and they agreed -- provided they could choose the colors.

2. Ideally your friends have an eye for color too. We took a field trip to Pink Castle Fabrics, back when it was still in Brenda and Jason's basement. There they learned that fabric is mesmerizing and captivating and makes decision-making difficult. They found out that there are a lot of shades of blue and gray and yellow and white (and many fewer of purple). But they persevered and selected a fabulous stack o' fabric which consisted of: white, lake, marine {more aqua-blue than slate-blue in real life}, regal {more purple-y than it looks on the screen or in pictures}, charcoal, and yellow. I confess I was a little unsure of the lake blue at first, wondering if it was too pale, but it worked well.


3. Start cutting (6" strips, cut into 6" squares). I started cutting at a crafty meet-up, where Rae dubbed the bundle of solids, "vestment-like."  Makes a lot of sense for a wedding canopy!

4. Sew: I divvied up the squares into factorial-like piles and started sewing. Somewhere along the way, my arithmetic went awry and as I finished -- or so I thought -- trimming the squares (down to 5 5/8"), I realized I needed about 18 more squares. At which point I grabbed some fabric, cut some squares, and sewed them together, without much thought as to the precise number of squares per color.

5. Iron for awhile. Consider vacuuming the "design floor." Get all determined and sweep and vacuum said floor. Start laying out squares. Move around as seems wise, or possibly because you step on some squares and mess up the order.


6. Maintain some semblance of order. As you may be able to see, I made myself little tags (right bottom) to keep the rows in order. For what may have been the first time ever, I did not mess up the order and need to unpick and resew. That might never ever happen again. But I think it's a strong endorsement of tagging rows in some fashion (mine are bits of fabrics with numbers written on them -- very high tech!).

7. Press seams for some time. Catch up on the season finales of NCIS, NCIS-LA, Castle, and whatever other shows you like.

8. Baste. I used a white flannel sheet as batting and a white cotton sheet as backing. I basted it over my ironing board, which I find is the best way to keep everything aligned, tight (I iron the layers as I pin baste, thereby smoothing out any wrinkles).


9. Quilt. I opted for what I like to think of as a lattice-like curved grid (a technical term to be sure). On the top I used white thread, and on the back I used white, purple, and yellow (purple and yellow being ze college colors and all).


10. Bind (in Kona Regal) and admire your handiwork. Also revel in finishing 2 weeks before the wedding and one week before your friends need the chuppah.

Enjoy watching two lovely people get married. Celebrate with them, think lovely thoughts about the ceremony (sunburn notwithstanding), take lots of pictures, play with fun filters, and wonder why capturing the gorgeous deep purple is so so hard.

Read more...

Crunch Time

>> Sunday, March 24, 2013


When I was in college (in the olden days), the dining halls had a bread table, and on the bread table sat a box of matzah -- presumably left over from Passover and set out until consumed. During my first year, I learned that there were people who actually liked matzah. This was a revelation, as I could not fathom how one could enjoy the taste of cardboard. It turns out that when one does not eat it for 8 days every spring, one can like it. I mean, it still boggles my mind, as I limit my matzah consumption to small amounts on Passover, but still, there's something in there for the psychologists to think about.


A friend recently enlisted my help in a gift project, and to help her, I realized I needed to figure out how to piece certain Hebrew letters, notably the tzadik (above). Rather than make a lonely letter, I decided to make a word -- matzah -- and then make it into a matzah cover. This was timely, since Passover starts tomorrow night. I kept things simple and made white letters and used a blue/green ombre fabric (Marimekko scraps). I wanted the quilting to evoke matzah (which is sort of grid-like in appearance) without sewing over the letters. I tried out some straight-edge free-motion quilting which, I learned, is harder than curvy free-motion work. Or maybe I just need more practice. I like the effect, imperfectly sharp lines and all.


I dug into my scrap bin for the back and played around with some improv curves. I think I might make a bigger quilt with curvy columns. Usually I choose my binding to make a quilt pop, but this time I decided to emphasize the ombre fabric and use it to bind the quilt. It blends along some edges and pops along others. I like it.

Read more...

Tutorial: How to Make a Challah Cover

>> Tuesday, August 7, 2012

One of the most frequent queries I get is "how do you make a challah cover?" I've avoided answering this question directly because there is no one way to do it. In a pinch, an unfolded napkin is just as functional in covering challah (delicious egg bread eaten on Shabbat (the Jewish Sabbath) and most Jewish holidays) as a beautiful silk-screened, embroidered, quilted, or otherwise crafted piece of art.

But Sew Mama Sew has provided me with a wonderful opportunity to demonstrate how to make a challah cover. The tutorial includes templates for paper-piecing Shabbat in Hebrew as well as complete cutting and piecing instructions. Even if you don't need one for yourself, here's a chance to impress your friends when you give them a fabulously modern challah cover with Hebrew letters. (A big thanks to Michelle, Anna, Brenda, and Torie for making sure the templates and instructions made sense to non-Hebrew speakers.) It may be in another language that uses a non-Roman alphabet, but you don't have to be able to read it to piece it!

Head over to SMS for my Challah Cover Tutorial. I'd love to see what you make!

p.s. If you want to machine-bind your challah cover, you can find my machine-binding tutorial here.

Read more...

Twinkle

>> Friday, August 26, 2011


 Several months ago I showed you my first paper piecing efforts. I wasn't really sure what I was going to do with the block, but I took the advice several of you imparted, and opted to make it into a challah cover/wall hanging. I added a slim aqua border and then a larger natural border, making the block a generous 19" square.

I knew pretty quickly that I would back it with a piece of Dogwood Stripe, from Laura Gunn's Poppy Collection (I think this print is now out-of-print, seeing as it's not longer listed on Michael Miller's website). I had used a tiny scrap on the front and wanted to show off the larger scale on the back.

{Please pardon the wrinkles!}

When quilting it, I opted for straight lines spaced about 1/4 - 3/8" apart within the natural border regions (I realize that makes it sound like I was quilting a political map of a contested war zone rather than a piece of art). I wanted the focus to be on the center circle of triangles, and I think I accomplished that. I also like how the slim aqua border puffs up a bit because it wasn't quilted.

I spent several months (literally) mulling over the binding. At first I considered using another aqua print, but that just seemed blah. Then I thought a green print would work well and pull out the green from the backing print. But I just looked at it, never finding it quite compelling enough. Finally I decided this was going to be a gift for friends I stayed with in Minneapolis and I needed to finish it before I left for the trip. And suddenly I knew that the peach Pearl Bracelet print (from Lizzy House's Red Letter Day collection) would be perfect. I had a momentary pause when I worried about the gray clashing with the natural, but I decided to stick with my gut, and I think the contrast makes the piece zing. And now "Twinkle" resides with my friends Dara and Barry who graciously let me stay in their Minneapolis apartment while they were away.

I think the binding is my favorite part of this challah cover/wall hanging. I already have more plans for the fabric as the binding of a future quilt. It's one of those prints that just works with so many colors, designs, and projects. While I missed out on some of the ducks from Red Letter Day, I'm glad I got my hands on this print. In fact, I'm finding myself more and more drawn to a lot of the "secondary" prints in big collections, especially the tone-on-tone or two-color prints that are extremely versatile and play well with others.

Read more...

Aleph-Bet Art

>> Friday, April 16, 2010

I just learned about these posters.

They're artistic representations of the Hebrew alphabet (aleph-bet). You'll note that in this one, the first (aleph), middle (mem), and last (taf) letters are shaded. In addition to marking the beginning, midpoint, and end of the alphabet, they also spell out emet (truth). The font used is a variation of a classic and standard printed Hebrew font.

In this image, a single aleph stands in the center, and each layer of the circle adds a new letter of the alphabet. The artist, Tsilli Pines, explains the story behind these posters here.

The combination of the font and the graphics remind me of the lettering one finds on posters from mandate Palestine and the early years of the state of Israel. The font is still in use and you can see how it has a certain sans-serif-y modern edge to it.

In addition to cool posters, Tsilli Pines also designs ketubot (wedding contracts) and offers DIY ketubah kits with suggestions for ways to customize them.

Read more...

Blog = Post-It Note?

>> Tuesday, July 21, 2009

I blog for many reasons, but occasionally I post something primarily as a reminder to myself. This is one of those moments.

Among the other projects I'll be working on in August is a chuppah for my friends' November wedding. The bride and groom requested that the chuppah echo/correspond to the ketubah design they've chose ("Love's Mosaic" by Robert Saslow, available here if you're looking). I've been working out the chuppah design and sketching out some color variations. I'm posting the ketubah image here so I can easily access it wherever I am (which these days is frequently not near my computer) and get a little done in the odd moments I have.


[Sneak-peeks of the chuppah will depend on how much the couple wants to see ahead of time, so no guarantees...]

Read more...

Coaster Giveaway Winner

>> Saturday, November 1, 2008

Thank you to everyone who participated in the coaster giveaway this week. It was wonderful to hear from so many of you and welcome so many new people to the site.

According to the random number generator,

the winner is #5, tc, who wrote, "I have a great *wink, wink* suggestion. Please, please post the coaster tutorial. I love the children's storybook ones!!" Congratualtions! I'll be emailing you to get your address and send off the coasters.

I really appreciated all of your thoughtful comments, and while I may not be able to respond to all of them specifically, I do want to take a moment to respond to the general gist of them as well as answer a couple particular questions.

I'm glad to hear that so many of you have enjoyed the coasters, like the tutorial, and find the recipes handy. I hope you enjoy making some dishes and some coasters. Please come back and let me know how they turn out.

As for ideas about improving the coasters, you've got some great ideas, and I'll be on the lookout for new materials to make them more trendy, more vintage, and even more funky.

I was happy to get some constructive criticism as well. I redesigned the blog a few weeks ago, but may be at it again soon. I'm very happy with the layout but I think I'll be playing the colors and seeing if I can make it "jump" a little more.

And, finally, I like when you ask questions. The pitter patter boutique asked what is a challah cover? Great question as sometimes I forgot I'm using terms that not everyone knows. On shabbat and Jewish holidays, meals begin with kiddush (blessing the wine) and blessing/eating challah -- an egg bread that is often braided. Why cover the challah? Technically one covers the challah so as not to "shame" the bread. What on earth does this mean? According to the rabbis of the days of yore, the blessing over the bread ought to come first; however, it's the blessing over the wine that sanctifies the shabbat/holiday meal. Thus in order to sanctify the occasion first and then bless the bread to begin the meal, we cover to challah so it doesn't "know" it's been passed over. Despite this explanation, which demonstrates as well as anything else, the interesting logic of the rabbis, it's basically become standard tradition to cover the challah. And since a challah cover can consist of anything from a napkin to a beautifully decorated cloth, it serves as another example of a Jewish ritual object that has become one type of Jewish art. You can see some examples that I've made here.

Read more...

Tree of Life Chuppah

>> Thursday, October 30, 2008

As I promised a couple days ago, I'm going to share a little more about last weekend's wedding in Boston. In the interest of keeping the posts to a somewhat reasonable length, I'm going to break them into two. For the crafty, craft-inspired, and craft-interested among you, I want to highlight Claire and Michael's beautiful chuppah (you may sometimes here "huppah" as the "ch" is a gutteral sound, not the hard "ch" of chomp) as well as their ketubah (wedding contract).

Claire's mom made the chuppah over the summer (I know there was a little anxiety last June about when it would be finished, but it was complete and gorgeous by the wedding). The chuppah, or wedding canopy under which the ceremony takes place, symbolizes the Jewish home the couple will build together. Many people use a tallit, or prayer shawl, as the chuppah but it can be made of anything and therefore represents a fantastic opportunity to customize, personalize, and aestheticize the wedding.

The chuppah in action, resting on 4 poles carved by Claire's dad. The carving was impressive as each pole is actually 3 parts and yet that was invisible. The pictures do not do the poles justice.

The chuppah up-close and personal:

The blue and green borders -- the flower embroidery on the green area matches the flower embroidery on Claire's dress!

The central image, a tree of life surrounded by 4 pairs of birds.


The ketubah presents another opportunity for customizing the wedding ceremony, both artistically and philosophically. To say that traditional ketubbot are not the most egalitarian documents out there is an understatement, though some will acknowledge this point while emphasizing its language was designed to protect women in ancient times. But I digress. Today, many couples choose to alter the traditional language (this is, after all, the contract that defines the terms of the marriage), either through somewhat standard forms or individually.

In this case, Claire wrote their ketubah to reflect the mutual commitments she and Michael were making to one another. Designed by friend and Cambridge artist, Josh Meyer, their ketubah is beautifully written, designed, and calligraphed:


Printed on what I think is handmade leaf paper, the contract (literally) flanks the central text, Song of Songs 2:10-12:

"My beloved spoke thus to me
'Arise, my darling;
My fair one, come away!
For now the winter is past,
The rains are over and gone.
The blossoms have appeared in the land.'" (JPS translation)

Read more...

  © Blogger template Autumn Leaves by Ourblogtemplates.com 2008

Back to TOP