Showing posts with label wedding quilts. Show all posts

So Much Sewing

>> Sunday, June 1, 2014

I know it's been forever and a day since I last posted, and much of that period stemmed directly from the lack of sewing time. Between February and early May, I'm not sure if I sewed a stitch. Finishing a dissertation will do that to you. But the dissertation is done and defended, and I've enjoyed a nice chunk of relatively open-ended time. Thus May has been, err, was (it's June today, woah), a wonderfully sewing-filled month.

One of the first things I did was make a long-planned wedding gift for Joel and Sibyl. They got married in September which was a lot of months ago, but I had zero time to make things back then. I did have time to purchase fabric, however, and I picked out some fun fabric for cloth napkins that also formed the basis of the color scheme and aesthetic of a table runner. At one point, my mom wondered what I was going to make for them, since I had already given Joel a quilt.

Joel and I were roommates back in the day, including the days in which he began dating Sibyl, and we spent a lot of time enjoying good food (not to mention our stunning ability to polish off whle jars of pickles and olives in one setting). Quality napkins and a table runner for Joel's super awesome craftsman-style table (which he found at a yard sale and was already in the apartment when I arrived) fit the bill.
 
Handily, Joel was in Ann Arbor for work this week, which meant that I not only got to give his wedding present to him in person but we got to take some fantastic parking lot pictures. Who doesn't need a few cars in their crafty photos? As it turns out, one of the awesome things about making gifts for people with whom you lived is that it's pretty easy to nail their aesthetic -- a task made even easier when you have quite similar taste. So the table runner has two sides, the little bits and bobs side and the chunks of cool fabric side. Both are intended to work well in the neat green kitchen J+S have in Seattle.

Initially I was a little uncertain about how to quilt this, given those tiny bits and a lot of negative space. I opted for undulating free-hand echo curves which I love. I used several shades of gray, blue/aqua, and black. While I could pretend that this was a design decision, made to reflect nature and the Pacific Northwest, the truth of the matter is that I ran out of both the medium gray and aqua while quilting and thus needed to add in more and more colors. Happenstance for the win.

Read more...

Eph + Eph, or How to Make A Chuppah

>> Tuesday, June 11, 2013

Sometimes you show up to graduate school and find out that another cohort-mate went to your alma mater, albeit 6 years after you did. Then you bond over purple cows, and become friends and office-mates. You meet his partner (who also attended your alma mater), who eventually moves to town, and you hang out some more. Eventually they get engaged and you offer to make their chuppah (wedding canopy) and, finally, about 4 months before the wedding, it's time to make it. So, how to make your friends a chuppah, in 10 easy steps.


1. Have friends who also have thoughts about design. A&Y looked through my blog and some flickr groups and we met to discuss what they liked and found compelling -- something modern, something with purples and blues, and something containing both regularity and surprise. I suggested a modern, random half-square triangle design, and they agreed -- provided they could choose the colors.

2. Ideally your friends have an eye for color too. We took a field trip to Pink Castle Fabrics, back when it was still in Brenda and Jason's basement. There they learned that fabric is mesmerizing and captivating and makes decision-making difficult. They found out that there are a lot of shades of blue and gray and yellow and white (and many fewer of purple). But they persevered and selected a fabulous stack o' fabric which consisted of: white, lake, marine {more aqua-blue than slate-blue in real life}, regal {more purple-y than it looks on the screen or in pictures}, charcoal, and yellow. I confess I was a little unsure of the lake blue at first, wondering if it was too pale, but it worked well.


3. Start cutting (6" strips, cut into 6" squares). I started cutting at a crafty meet-up, where Rae dubbed the bundle of solids, "vestment-like."  Makes a lot of sense for a wedding canopy!

4. Sew: I divvied up the squares into factorial-like piles and started sewing. Somewhere along the way, my arithmetic went awry and as I finished -- or so I thought -- trimming the squares (down to 5 5/8"), I realized I needed about 18 more squares. At which point I grabbed some fabric, cut some squares, and sewed them together, without much thought as to the precise number of squares per color.

5. Iron for awhile. Consider vacuuming the "design floor." Get all determined and sweep and vacuum said floor. Start laying out squares. Move around as seems wise, or possibly because you step on some squares and mess up the order.


6. Maintain some semblance of order. As you may be able to see, I made myself little tags (right bottom) to keep the rows in order. For what may have been the first time ever, I did not mess up the order and need to unpick and resew. That might never ever happen again. But I think it's a strong endorsement of tagging rows in some fashion (mine are bits of fabrics with numbers written on them -- very high tech!).

7. Press seams for some time. Catch up on the season finales of NCIS, NCIS-LA, Castle, and whatever other shows you like.

8. Baste. I used a white flannel sheet as batting and a white cotton sheet as backing. I basted it over my ironing board, which I find is the best way to keep everything aligned, tight (I iron the layers as I pin baste, thereby smoothing out any wrinkles).


9. Quilt. I opted for what I like to think of as a lattice-like curved grid (a technical term to be sure). On the top I used white thread, and on the back I used white, purple, and yellow (purple and yellow being ze college colors and all).


10. Bind (in Kona Regal) and admire your handiwork. Also revel in finishing 2 weeks before the wedding and one week before your friends need the chuppah.

Enjoy watching two lovely people get married. Celebrate with them, think lovely thoughts about the ceremony (sunburn notwithstanding), take lots of pictures, play with fun filters, and wonder why capturing the gorgeous deep purple is so so hard.

Read more...

A Little Spice

>> Thursday, December 27, 2012


Sometimes the closet provides the perfect upcycled wrapping. Because a warm, flannel-backed quilt might just save you 10 percent on your heating bills this winter. I finished this quilt right before I went home for Thanksgiving, and I wanted to make sure it stayed protected in transit. That, and I needed to deliver it to the person who commissioned it as a wedding gift, and I thought she'd enjoy the temporary wrapping.


I showed a few glimpses of the quilt in progress way back when I started it. As noted then, the design is based on Felicity's lovely Sea Glass on Sand, and based on her (and other feedback) I added in a couple of mulberry triangles to pop against the browns, greens, and creams. The colors, along with the seasonal scents they evoke and the occasion for the quilt, led me to dub it "A Little Spice" as I constructed it; the name stuck. The color scheme is a little different from my typical choices, but it was designed for the couple whose apartment is decorated in creams with green and brown accents. Working out of my color comfort zone pushed me to think about design, and how a quilt could sing in a more muted palette.


I love how the bright white draws the eye in as much as the greens and darker tans. The blocks were all 6" and I originally planned a 10x12 layout, I added an extra row to make it 10x13 (or 55"x71.5") as I pieced it together. The seam allowance ate up the 1/2" between rows and while I knew that would happen, I felt a need to compensate. Or at least make sure there would be room for the couple's toes. I borrowed the quilting plan from Felicity as well, using 2 interlocking curves on the diagonal -- a technique I'll certainly use again.


The quilt commission came with a request for a "soft back," and I opted for flannel. A flannel sheet from Target to be specific. The sheet is thicker than quilting flannel, so that plus a layer of batting makes for a substantial throw quilt. Using a sheet also eliminated the need to piece the back and, as it was bigger than the front, simplified basting as well. The binding is a Heather Ross print, Meadow Flowers, I picked up in the sale vault at Lake Street Mercantile about 4 years ago. Apparently I could have sold that yard for about $36 right now (admittedly, it's no goldfish), but I'm content to let aesthetic value trump financial gain. Plus, if someone had purchased it, I would have had to go to the post office between Thanksgiving and Christmas, and that surely represents a terrible use of time.

Read more...

Step-by-Step

>> Tuesday, October 23, 2012


120 6.5" squares waiting to be turned into a quilt. A commissioned wedding quilt for a couple getting married in December. The instructions were wonderfully simple: come up with a quilt for a couple whose apartment has a cream/brown/green color scheme. I toyed with several ideas for the quilt, mostly thinking about wide improv pieced curves, a larger version of this challah cover in a different color scheme. But then I saw Felicity's Sea Glass on Sand quilt, I quickly formed a new plan.


I dug into my collection of solid neutrals, added a few more from my (local) quilt shop Pink Castle Fabrics, and started cutting. Moda Snow dominates, as I had some yardage of it, but the pile also includes Moda Porcelain, Kona Snow/Putty/Oyster/Parchment, Fig Tree Cream, and unlabeled neutrals from my scrap bin. I had more shades of green and fewer shades of brown than I expected (or realized). But a sufficient spread to keep the corners interesting. I considered mixing in some prints, but I like the look of all solids.

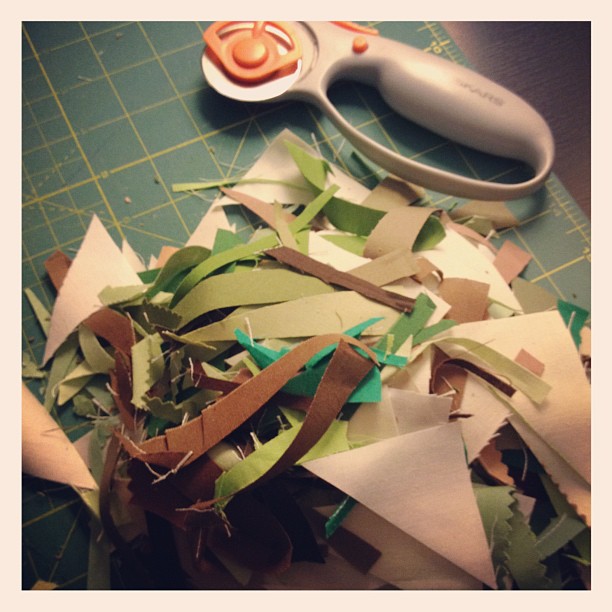
I'm still considering adding in a few punch of mulberry (shot cotton, that is). I plucked three squares from the pile before trimming so I can play with the layout and change my mind, rip out some seams, and insert a few dots of difference. I usually dread trimming and squaring blocks. But a few episodes of Dexter (I'm still on Season 5) made the work less tedious. The blocks are trimmed and ready for my design floor. Once I sweep and vacuum said floor, anyways.

p.s. In anticipation of Pink Castle Fabrics' move into a new brick and mortar space, everything in the shop is 25% off through the end of October, with the code MOVING. Depending on when you place your order, I might just get the chance to cut and package it for you.

Read more...

A Day at the Lake

>> Saturday, April 2, 2011

It's not quite lake-weather in DC, though it is supposed to get warmer tomorrow. But this is a long overdue wedding quilt for two friends, Cynthia and Andy, who got married in August when it certainly was lake weather. Growing up, both spend a lot of time in the Adirondacks with their families and, over the past decade or so (!), have spent a lot of time there with one another. As soon as I saw their invitation, which used multiple shades of blue and included an image of a boat, I knew blue would be central to whatever I made for them.

Joel Dewberry's Modern Meadow line in the "Pond" palette was perfect for this project. When it first came out, I knew I would find a use for it, and I had squirreled away 8 prints and 2 coordinating Bella solids. I stored this group of fabric in my bin of "special project" fabrics -- these are the ones I know I want to use together and wait for the right project. This table runner was certainly the right project. I mulled over possible designs, at first thinking about making sailboats and wonky stars. I played around with some layouts and tried to find a sailboat block I liked. But nothing really stood out. So I opted for sashed bricks (3.25" x 6.5" bricks and 1.5" sashing), a design that I think is great for displaying the wonderful fabrics in this collection.

While the brick design is somewhat traditional, I went for modern, improv, and funky on the other side. When I made the bricks, I cut 3.25" strips from each of the 10 fabrics and then 3 bricks from each, which meant that I had plenty of the strips left. I started to chop and sew and see where it went. I got so into it that when I sewed all the rows together, it was much bigger than the other side, at which point I trimmed it down. I like how the two sides use the same fabrics in really different ways, both because they show how fabric can be deployed in a variety of patterns and also because it gives Cynthia and Andy two options for display.

I used the white sashing as the guide for quilting, only sewing within those lines but meandering around the bricks in no particular order which created a neat design on the other side (this picture was taken before I washed the runner).

Originally I thought I'd bind the runner in the navy solid, but as I put it together, I decided that the "flower fields" print would be a better option. I'm glad I chose it as I think it helps bring both sides together in ways a solid would not.

And there were still more leftover pieces of fabric. Coordinating coasters were in order, and I made 6: 2 each in 3 different designs. The one peeking out from the bottom has a strip of modern meadow fabrics across the middle, with white on either side. As hard as it was to send these off, I loved sending them to Cynthia and Andy who are just fantastic people. And, since they live just outside NYC, I'll get to hang out with them later in the spring when I'm in New York.

Read more...

The Big Reveal

>> Wednesday, March 23, 2011


It's finally finished! I'm really pleased with the way this string quilt turned out.  I followed this paper-piecing method (which also happened to be the method used by a small group quilt-along I joined). While there are quicker ways to piece a string block, this method creates a pattern out of the red center strings that I don't think is possible from the quicker methods (perhaps I'm wrong?).


Although the blocks primarily use black and white fabrics, I threw in a few more red prints for some variation. I tried not to overthink the fabric choices within each block. Aside from not repeating the same fabrics within a block, I picked up a strip of fabric and attached it. If I sued a red print, I hewed to two per block and one per side, though I didn't necessarily use a red print (aside from the center solid).

The wind made it challenging to get a good picture of the back of the quilt, and this was the best my wonderful assistant (who wanted to be invisible) and I could get. Michelle helped me out by sending me some black and white blocks that made their way to the back of the quilt. Originally I envisioned using string blocks on the back of the quilt, much like I created the column of blocks here, and using a completely different pattern on the front. Once I started making the string blocks, however, I opted to continue making them and using them on the front. When it comes to quilt design, I change my mind all the time. It's the one area of my life in which I fully and truly embrace going with the flow and ditch planning.


The free-motion stippling on the quilt almost killed me. It certainly killed a lot of thread, some of which stayed in the quilt and much of which got ripped out. The red solid is "Christmas Red" from Moda, and it's a cheery, bright red. I used it for the binding as well, which I think helps frame the quilt. At 60" x 72" this is a large lap quilt, and I hope this quilt is well-used for many years in the future.

My sister loves red, black, and white and used this color combination for her wedding. In addition, she and her husband have a large black dog (who growls at me every time she sees me and, really, dislikes anyone who is not my sister or her husband). While this leaves me less than fond of Snoop, I figure the quilt will hide her fur fairly well.

Read more...

Design Via Savvy Shopping

>> Sunday, February 20, 2011

Over the past 5 weeks, I've been inching my way towards a quilt for my sister and her husband. They got married in November but since quilt presents do not emerge fully formed with the press of a button, there was no chance that I would bring a wrapped present with me to the event. At that time, I had started collecting some fabric for it, but hadn't even settled on a design. The design changed a lot as I toyed with a lot of options and variations on those options. The only constant was the color scheme: red, black, and white. My sister has always loved this color combination and they used it for the wedding, so that decision was easy. Then, at a SE Michigan Craft Meetup, Emily told me about Lake Street Mercantile in South Lyon, MI. In early November, I went to check it out. Their collection has some modern fabrics alongside, shall we say, less modern fabrics. They also have a nice little sale room in which I found the black and white "big harlequin" print (above left) half-off. Anyone who knows my sister knows that she is an excellent bargain shopper and, indeed, takes immense pride in her shopping savvy. I decided to design the back of the quilt around this fabric.

My sister claims she only reads my blog when I post about travel (how she knows when this happens, I'm not quite clear. Perhaps my mother passes on the information). In any event, while I'm tempted to show the full front and back "flimsies" -- the pieced front and back before being quilted -- I'm going to stick to partial pictures of each. In the case of the front, the wrong side will have to suffice. I'm going to baste the quilt as soon as I finish posting, so hopefully I'll have a quilted and bound quilt to reveal soon. I may need to get some more fabric for the binding, however, as I forget how much fabric the binding of a big quilt requires.

Read more...

Flowers in the Meadow

>> Wednesday, February 17, 2010

 
I. love. this. quilt. I made it for my friends Annie and Daniel, who were married this summer in a lovely ceremony. It's not spring yet, but the quilt reminds me of spring and summer, of grassy meadows with a few wildflowers poking through.

 
As you might notice, it's not summer in the pictures. Though I knew I wanted to make them a quilt, and I knew that I would use lots of green, with some touches of dark pink, I didn't start cutting the fabric until December. I'm glad I waited, as I constructed the quilt front after making this one, and I know that "Flowers in the Meadow" is better as a result.

The design started with the pattern to Amy Butler's Decorative Patchwork Throw (found In Stitches). I liked the idea of big chunks of fabric (and I used a fair number of Amy Butler prints in this quilt). But, like usual, the quilt transmogrified along the way. An improv adventure ensued, with one basic principle: big swaths of fabric.

Lots of awesome fabrics? Check. I varied the piecing, incorporating a big 9-patch block as well as some squares-in-squares and squares-in-rectangles and more squares and rectangles.

And then the chickens gave me an idea. The fabric didn't really fit with the other greens, but chickens are so Annie and Daniel. They would have a chicken coop if they could, and eat fresh eggs all the time (their dog, Mason, might not let this happen so easily). But there was a nice chicken pair, and it needed to make its way into the quilt. A little fussy cutting and zig-zag stitching later, and there lay the chickens.

 
The chickens were up for some company, and so arrived the turtle pair. Another green print that didn't quite work with the rest of the quilt, but placed on a white background and attached to the quilt, now made sense.

The birds are not green and neither is the background fabric. But they're loud and fun and wanted to preen on the quilt. So I let them. They work with the deep magenta and pink fabric that, I think, helps the quilt pop.

Annie and I agree that the grey fabric is just lovely. It might be my favorite, if I have to pick favorites and I used 2 big chunks of it. I should have ordered more of it, but when I was selecting fabrics online, I didn't realize the extent of its beauty.

I am not a pink person, but pink works here, and I knew it was the right color for the binding. In late December, I scurried to the store to get it, as my not-too-large pink collection lacked a good pink with enough yardage for the binding (the quilt is ~ 54" x 72").

As for the quilting, I opted for diagonal stripes, at varying widths. Sometimes an inch or 2 separate the lines, sometimes just 1/4" or a 1/2". Masking tape helped me stay on target, though it was a little tough in spots.
Finally, an outtake from today's picture-taking. My commuter bike really wanted to make an appearance on the blog, because some friends think I'm a little loony for biking in the snow. They're probably right, but I don't bike in the snow, only on the less snowy streets. Totally safe...except when it's slick.

Read more...

Chuppah in Action

>> Tuesday, November 10, 2009

Beth and Harley's wedding was this weekend, and the chuppah looked wonderful, if I do say so myself. Alas, my camera decided to accelerate its death this weekend, leaving me with mostly useless pictures of dark blobs. However, pictures from other people in attendance are starting to tricle in (or trickle to facebook!), and I'll post them as I encounter them.

First, an up-close, stained-glass-like view:


And, just for the heck of it, a watercolor-like version:


This was the ketubah, which the chuppah was designed to complement:

And, finally, the view of the full chuppah.

I'm hoping to acquire a picture of the chuppah and ketubah together because they made a fine visual pair.

*all photos posted here courtesy Marlene Seidel

Read more...

A Quilt for Claire & Michael

>> Saturday, December 27, 2008

Red shoes: check
Red wallet: check
Red pots: check

When thinking about what quilt to make for Claire & Michael, I knew it had to include red. While Claire doesn't wear much red, she has quite a few red accessories and it just felt like the right color. I hoped Michael would agree!

Hewing more closely to a quilt pattern than ever before, I made them a version of "Peppermint Twist" from Evelyn Sloppy's 40 Fabulous Quick-Cut Quilts (111-3).

If you were wondering what this stack and this border comprised, here it is in its (almost) entirety.


I started with the white-fabric-with-red-flowers I used in the middle and selected other fabrics to complement it.

I had just enough to make the quilt center and thought the red-with-white-curliques matched it well.

In looking for a striped border fabric (that I also used for the binding) I found the diagonal stripes. The more I sewed it, the more I liked it. I particularly appreciate that the lines are slightly irregular, with some thicker and some thinner and sometimes three thin lines between two thick ones and other time three varying widths lined up together. It's a little hard to see, but I mimicked the irregularities in the quilting by staggering the diagonal lines.

I backed the quilt with soft red fleece -- I'm still finding some tufts of it around my house. With the borders, the quilt is about 62" x 62" -- a nice lap quilt size that I hope Michael and Claire will use for years to come. I can imagine curling up under it to read on Friday nights after shabbat dinner as I know is their custom.

Read more...

  © Blogger template Autumn Leaves by Ourblogtemplates.com 2008

Back to TOP